A Complete Guide to Creating a Design System That Works in 2024
UI/UX Design
Introduction
A design system is a fundamental asset for any organisation that relies on a digital product. It allows designers and developers to quickly replicate components while keeping to design guidelines - helping to create consistency.
Surprisingly, a lot of companies still lack a design system.
This leads to designers and/or developers creating inconsistent UI elements with varied styles, sizes and colours, such as buttons and text fields. These minor errors require extra time to correct, having a knock-on effect on budgets and project scope.
Komodo created a design system for Excelpoint, a company specialising in a no-code software solution for businesses. Their platform allows businesses to create unique systems using drag and drop, meaning no programming is required. Excelpoint uses Bootstrap to create its B2B application, and its UI elements were slightly dated.
We will walk you through how we created a design system that works from them.
Research
The first step in this project was applying best practices. In this section, we’ll focus on input fields, as it’s one of the primary UI components users interact with when using Excelpoint’s system.
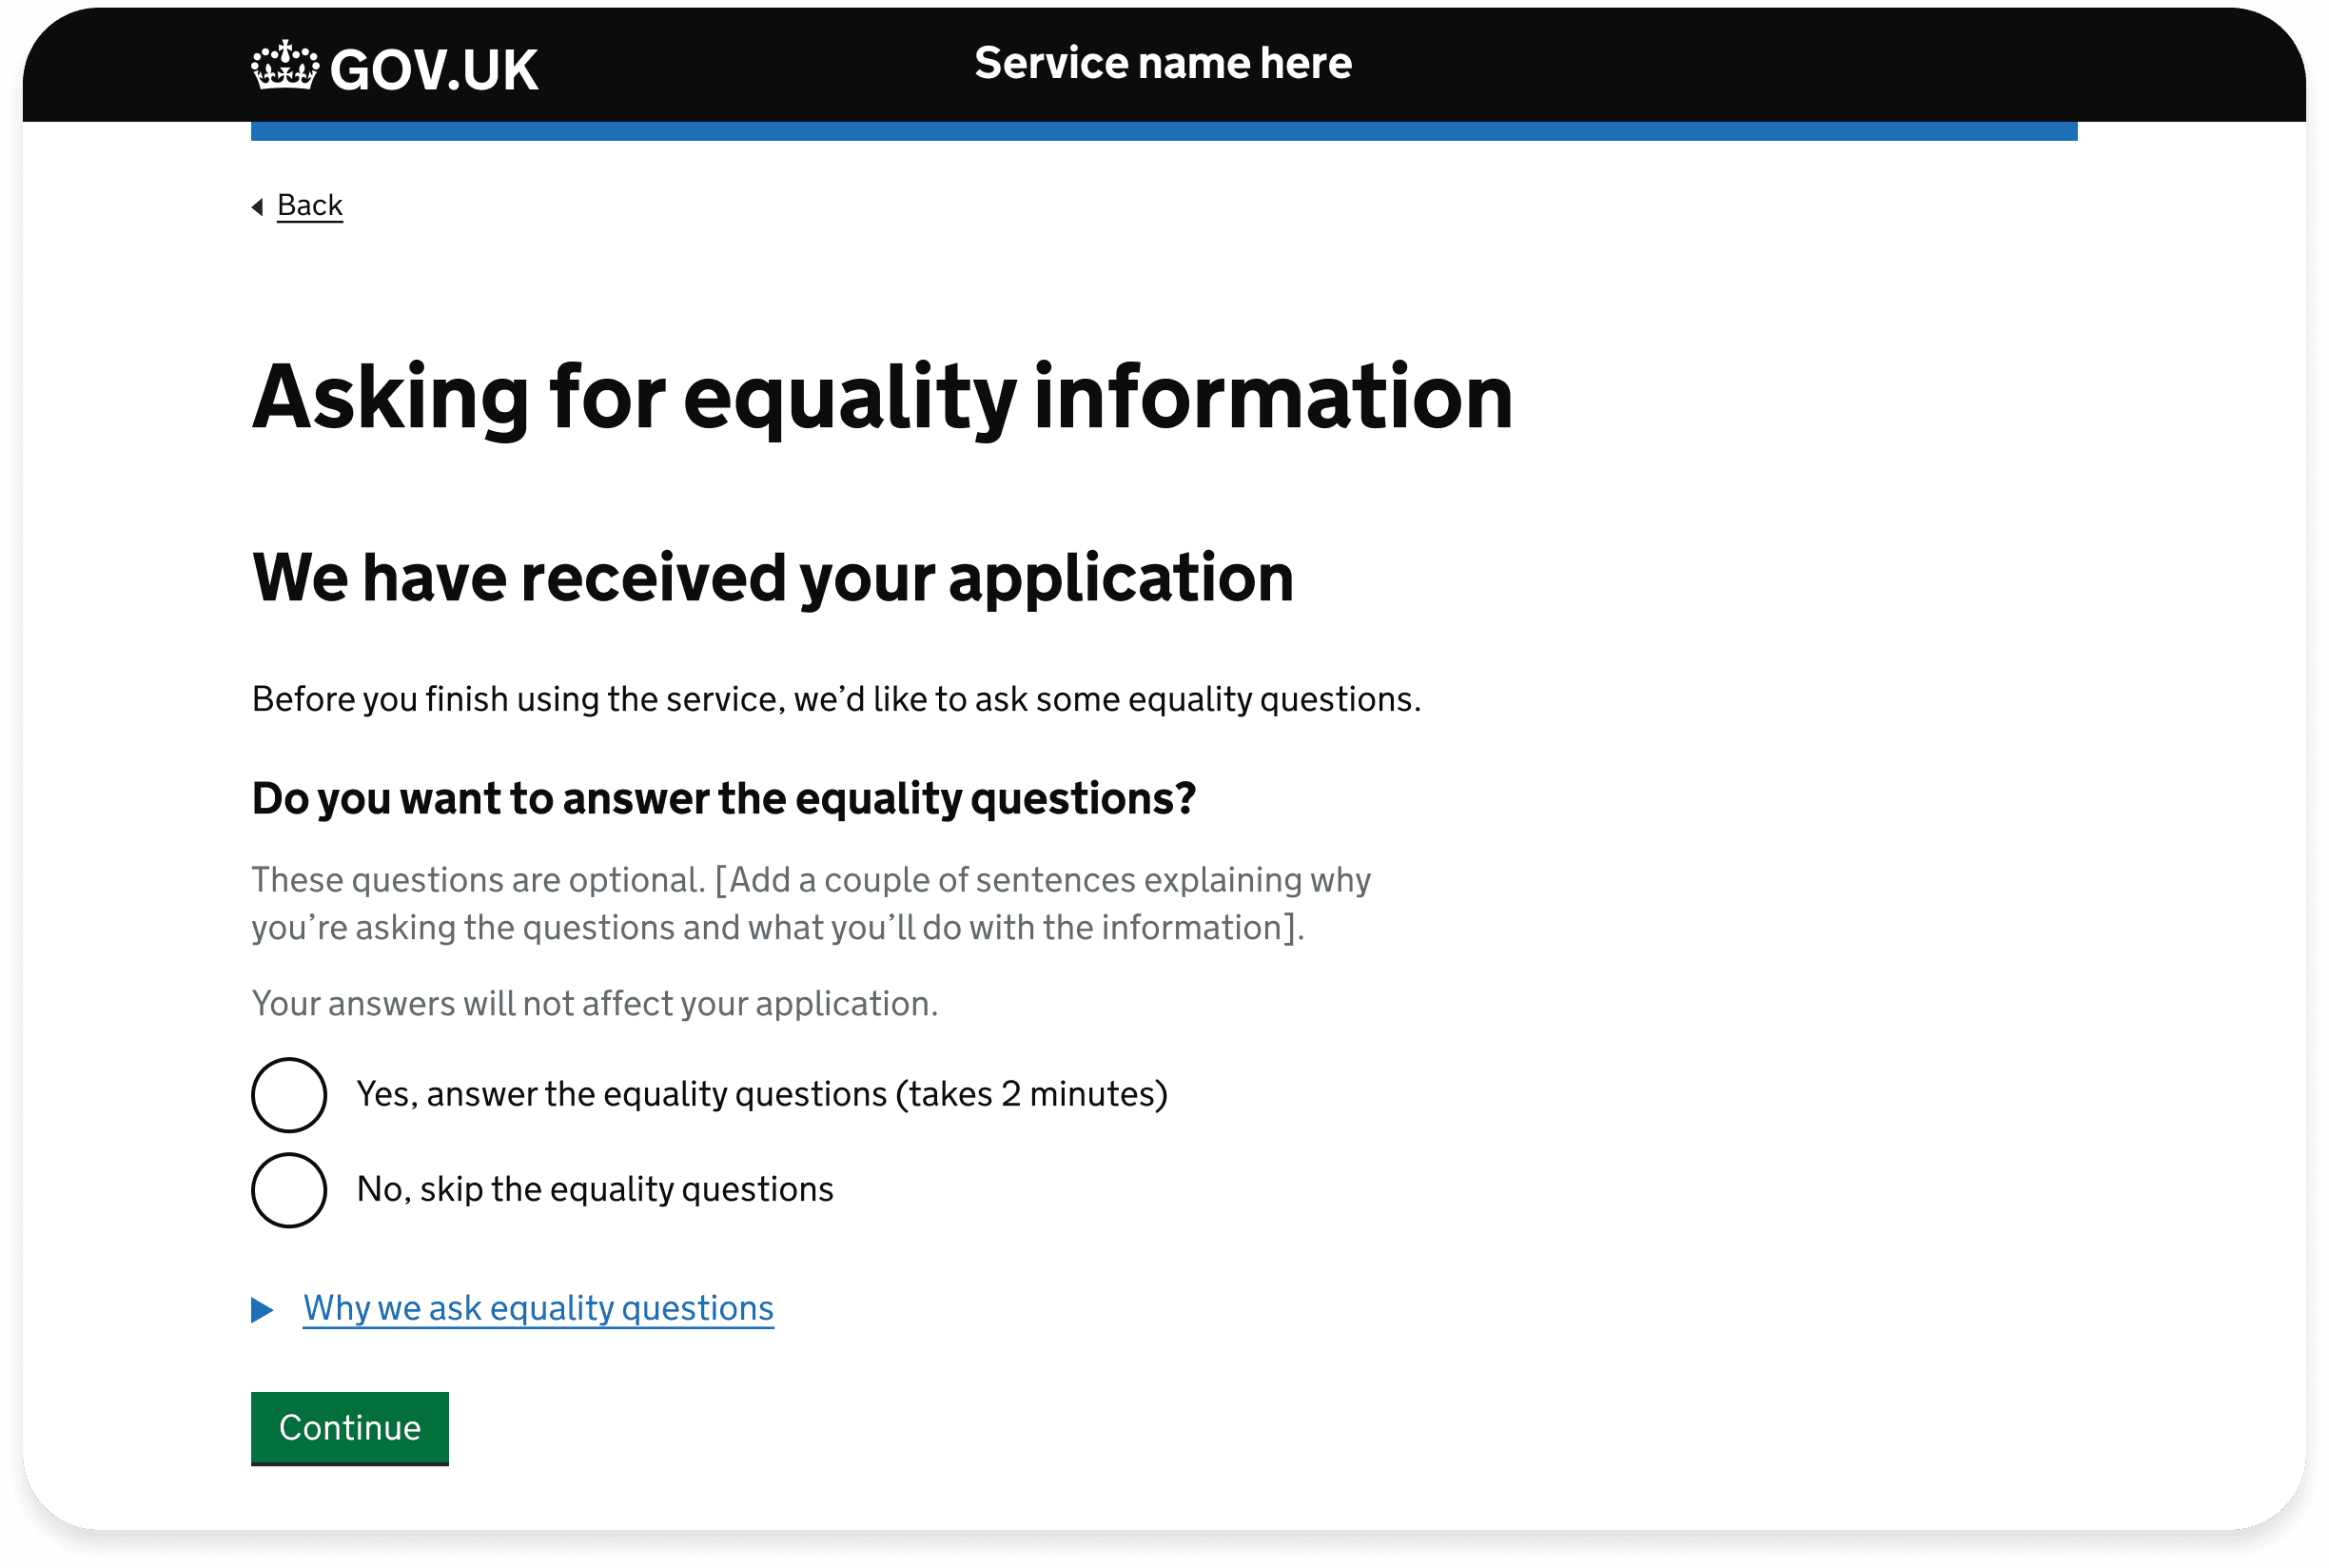
Government Design Guidelines
The first source we consulted was the Government Design Principles on the GOV.UK website. The guidelines and components created and tested by the UK Government make sure that the whole UI is inclusive, legible and readable.
The chosen colour palette specifically meets the minimum requirements for accessibility. For example, you use the colour red when expressing an error state. Like when a user misses a text field in a form.
Text size is another area of the Government Design Guidelines test. Text size should always be at least 14px or more to meet the minimum accessibility requirements. The government uses 16px for their body font.
States and Styling
Each of the components used with Excelpoint's current system has several states. For example, a standard text input field could have 5-6 styles depending on user interaction. At any point, a text field can have the following states:
A resting-state
A hover state
A pressed or selected state
A complete state
An error state
It's crucial to clearly define these different states to the end-user.
After researching best practices for text input fields the main opportunities we identified were title placement. Excelpoint had titles for their text fields positioned to the left, whereas best practice is placing these directly above the text field.
This helps with readability and screen real estate when viewing on smaller devices.
Q&A
Once we gathered our research for the project, we followed up with Excelpoint to ask any questions regarding the existing system.
By doing this, we could develop a more robust understanding of why the client:
Took particular routes within their current component set.
What we could and couldn't change.
Discover any restrictions regarding styling changes.
Planning the Design System
Due to the scale of the project, we combined our research with the requirements of the project scope. Working virtually, Komodo’s design team used Miro, a collaborative virtual whiteboard platform, to enable us to ideate as a remote team.
Our first step in planning was to agree on styling changes, ensuring they were suitable for Excelpoint and their users. Choosing clean, minimalistic styling meant we could select colours that were not restricted by Excelpoint's branding but also met all accessibility colour requirements.
At this stage, we decided that the best option would be to reposition all text field titles to the top rather than the side, allowing for an improved user experience across the platform.
To keep track of design changes, we store all visual changes made to each component in a research document.
For each adjustment, we detailed what changed and why. We ensured this document was updated daily, allowing the design team to keep track and allow Excelpoint to use it as a reference during development.
Mapping Out The Existing System
One of the critical parts of the project was to map the existing system. As each component could have around 5-9 various states, it was vital to ensure all states were taken into account. These consisted of but were not limited to:
Resting-state
Hover State
Clicked/Pressed State
Completed State
Error State (Resting)
Error State (Hover)
Error State (Clicked/Pressed)
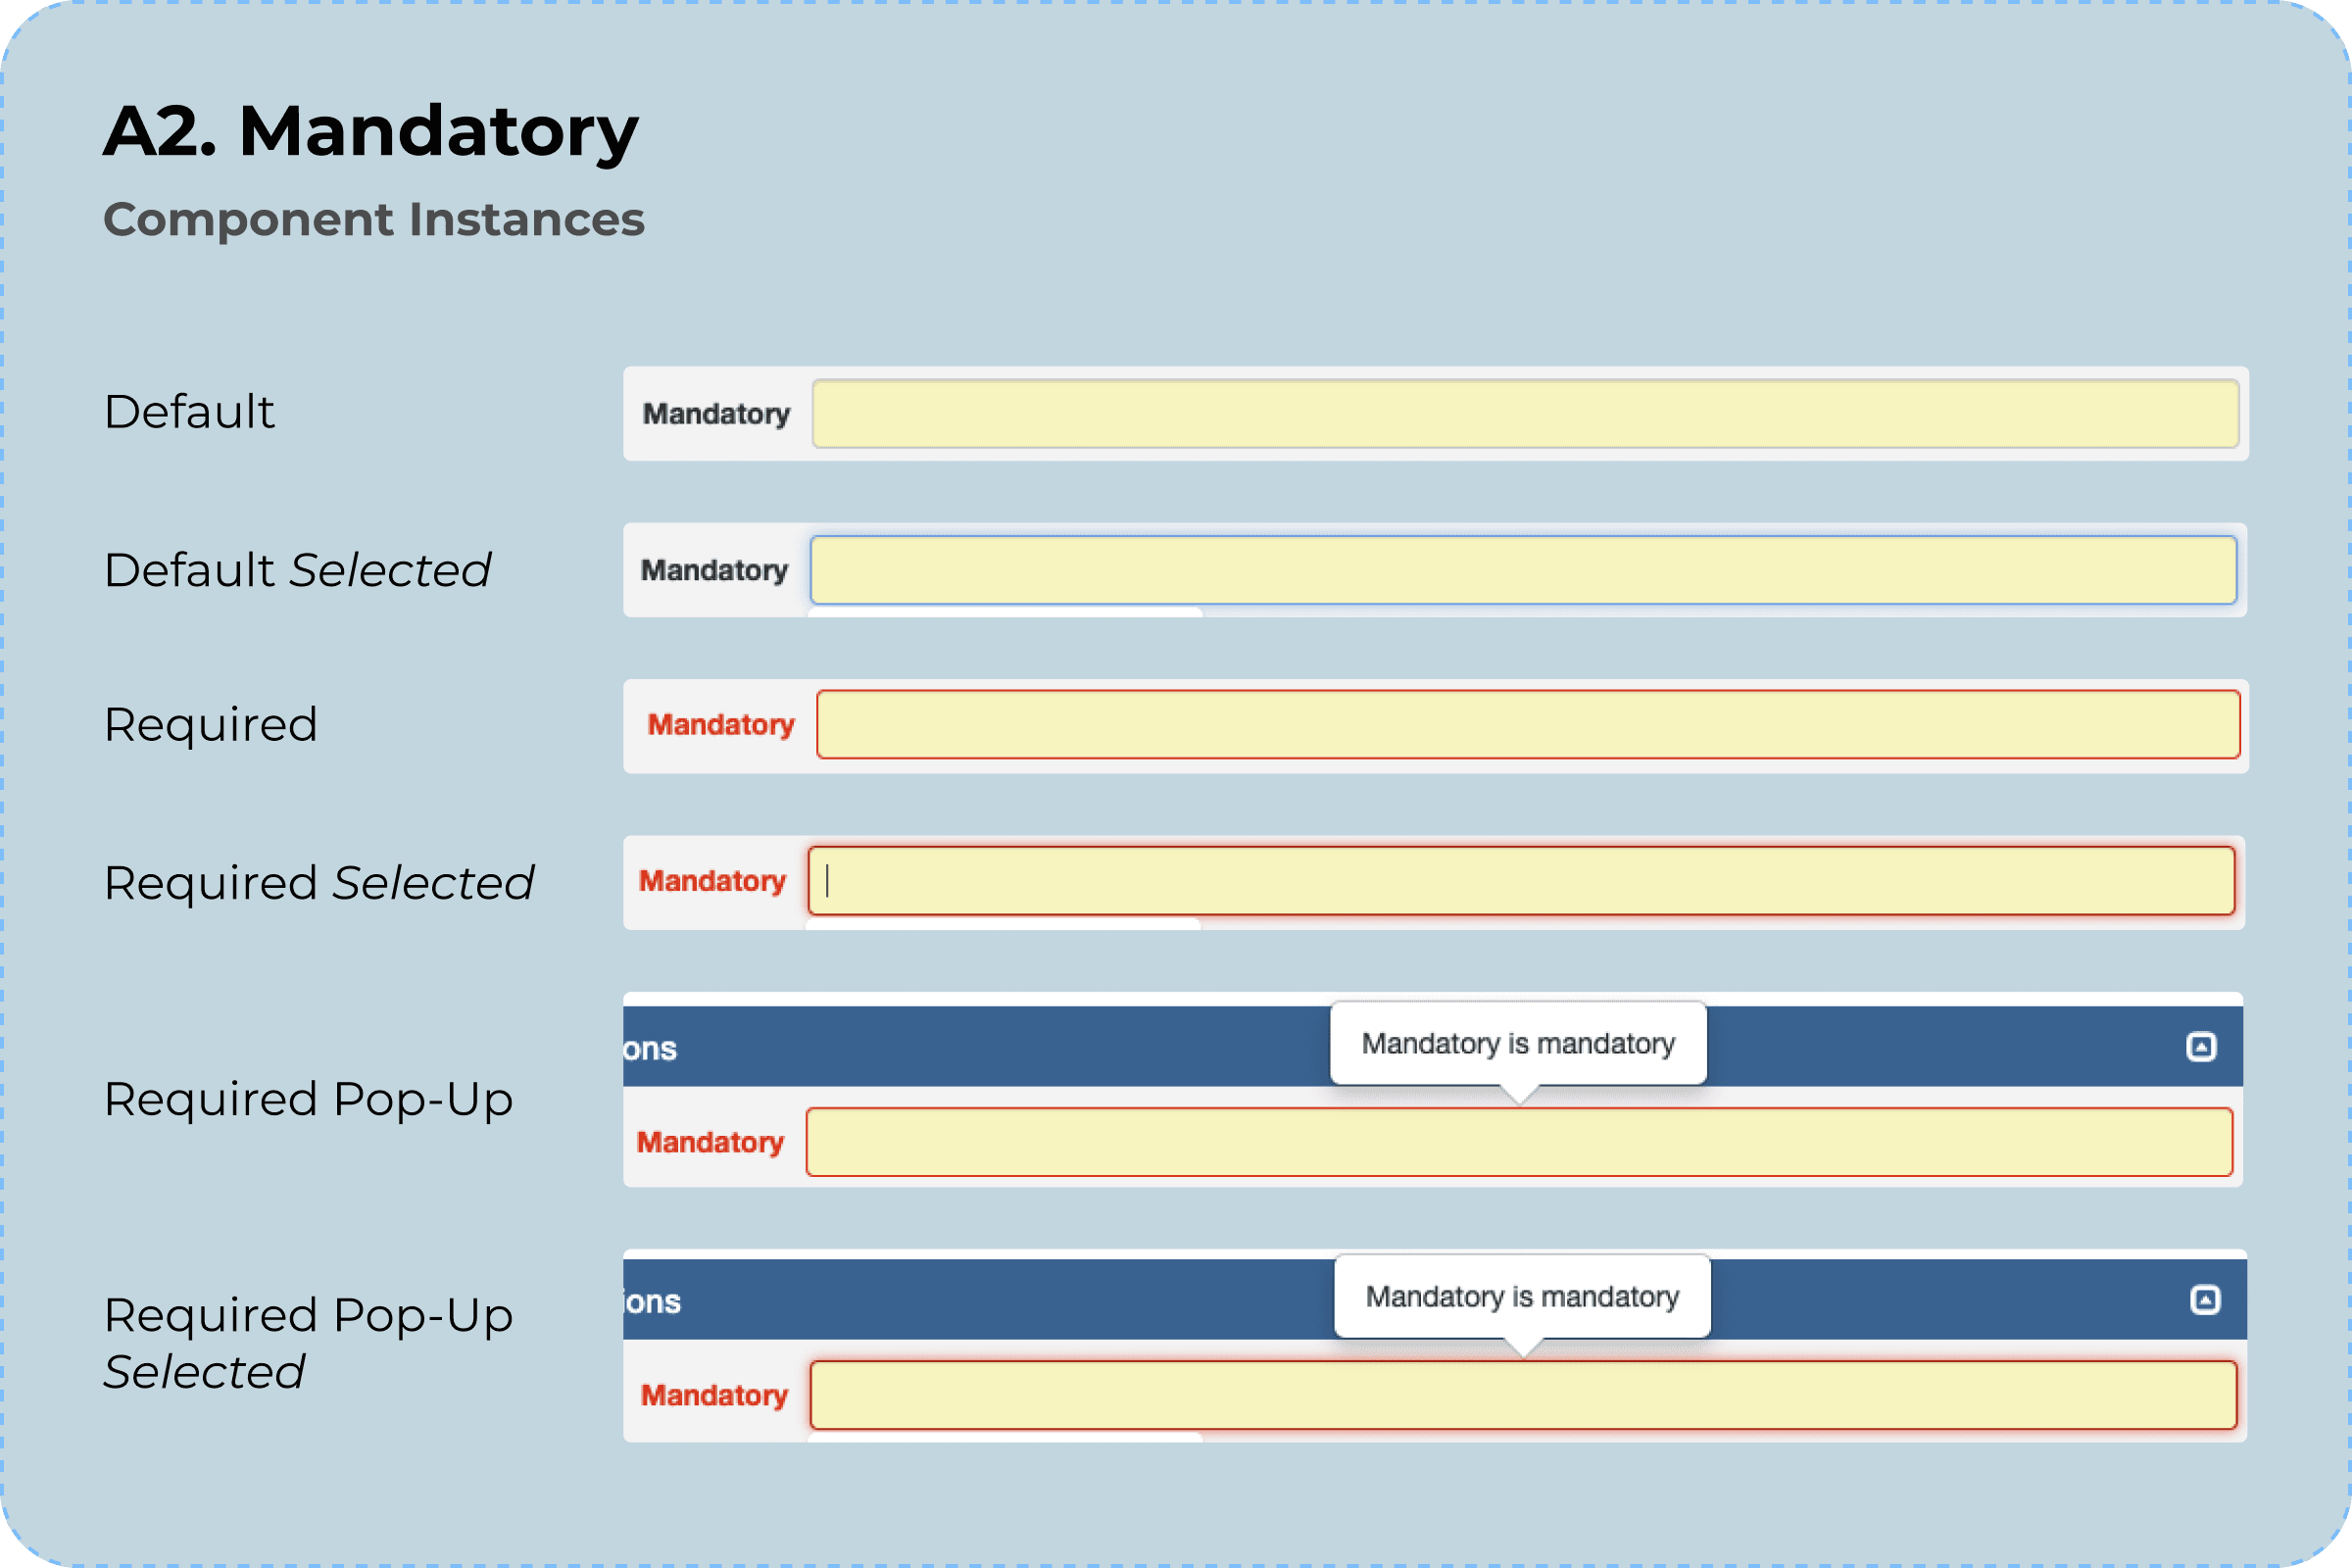
To achieve our goal, we decided to use Figma instead of Miro. Although Miro is an excellent platform for collaborative work, Figma allowed us to have the existing components side-by-side with the new components (as these were going to be created in Figma anyway).
We created individual sets for each component and their various states. There were 4 different component sets, which had approximately 80 components each.
Each set was labelled with a corresponding letter, and numbers were used to represent the various components within the collection (such as A1, A2, A3). This created a detailed view of the components we were set to redesign.
Redesigning the Components
Style Guide
Before jumping into the redesign, there needed to be a style guide for the product designers to follow.
Having guidelines makes the components uniform, eliminating inconsistencies between two or more designers' work, including the most common offenders: sizing, spacing, colour and font sizing.
Never underestimate the capacity of a style guide to reduce workloads!
Prioritising Components
Understanding the priority in which the components needed to be created was essential; in this case, we created demo prototypes.
Excelpoint were using these interactive demos to receive feedback from a selection of their current user base. So naturally, the first design sprint focused on delivering features necessary for user testing.
Redesigning the components
The first changes we made were the positioning of the text field title.
As discussed during the research phase of this project, the placement of the title for a text field can make a significant difference in terms of readability and screen real estate when viewing on smaller devices.
When users view content, they scan over the screen. If the positioning of elements is inconsistent, it can make it harder to digest, increasing the time spent completing forms.
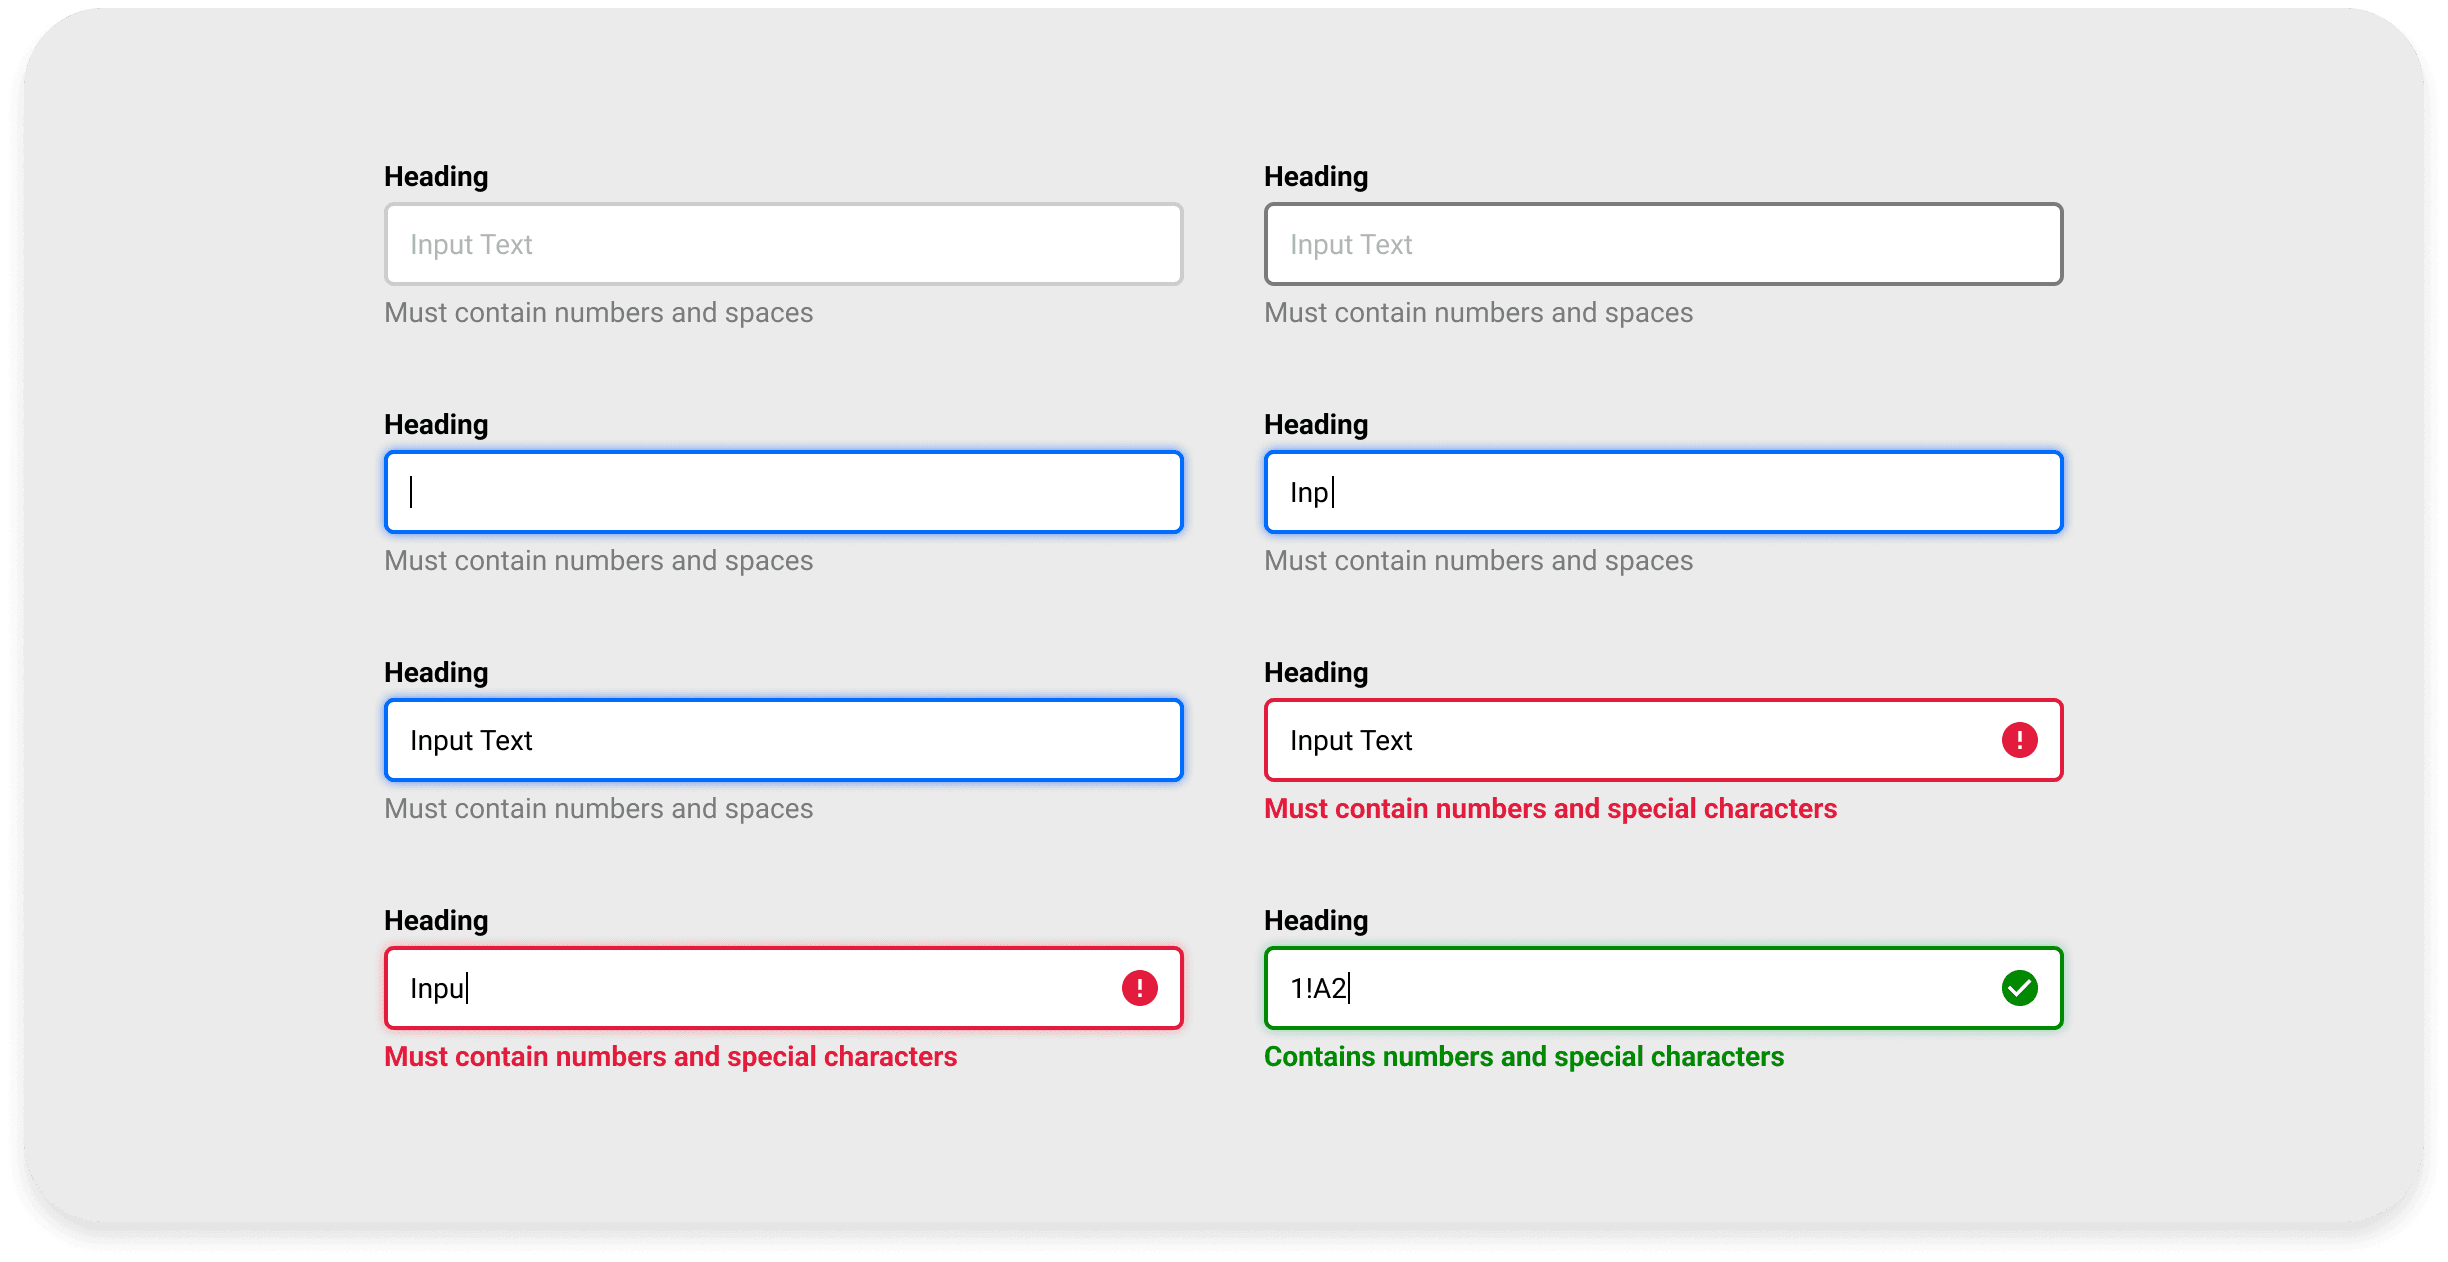
The text fields were added above to accommodate for readability. We made the title font bold to demonstrate hierarchy to stand out from other inputs. The addition of placeholder text in the field guides the user on what to do next. To highlight this, placeholder text is formatted in a light grey colour.
As we added text to our redesigned components, we needed to ensure that this text met a minimum of AA for accessibility according to the Web Content Accessibility Guidelines (WCAG).
Luckily, we knew we had an excellent contrast ratio for any text, as we could use black text against a white background. We also ensured our font size was a minimum of 14px for the text fields. Any smaller than 14px creates accessibility issues for those with visual disabilities.
📘 If you're interested in learning more about Accessibility, click here to download our Accessibility Whitepaper.
The existing system emphasised mandatory fields with a pale yellow shade and a red asterisk. Any optional fields were defined as regular fields. Most fields were compulsory anyway. So, we made all required fields a standard text input field and made any optional fields stand out with an 'optional' text note positioned to the right of the title.
Flipping the current standard on its head meant the user could identify 2-3 optional fields rather than being informed of the 11-12 mandatory fields. This improved the user experience since there were usually fewer 'optional' fields than required fields,
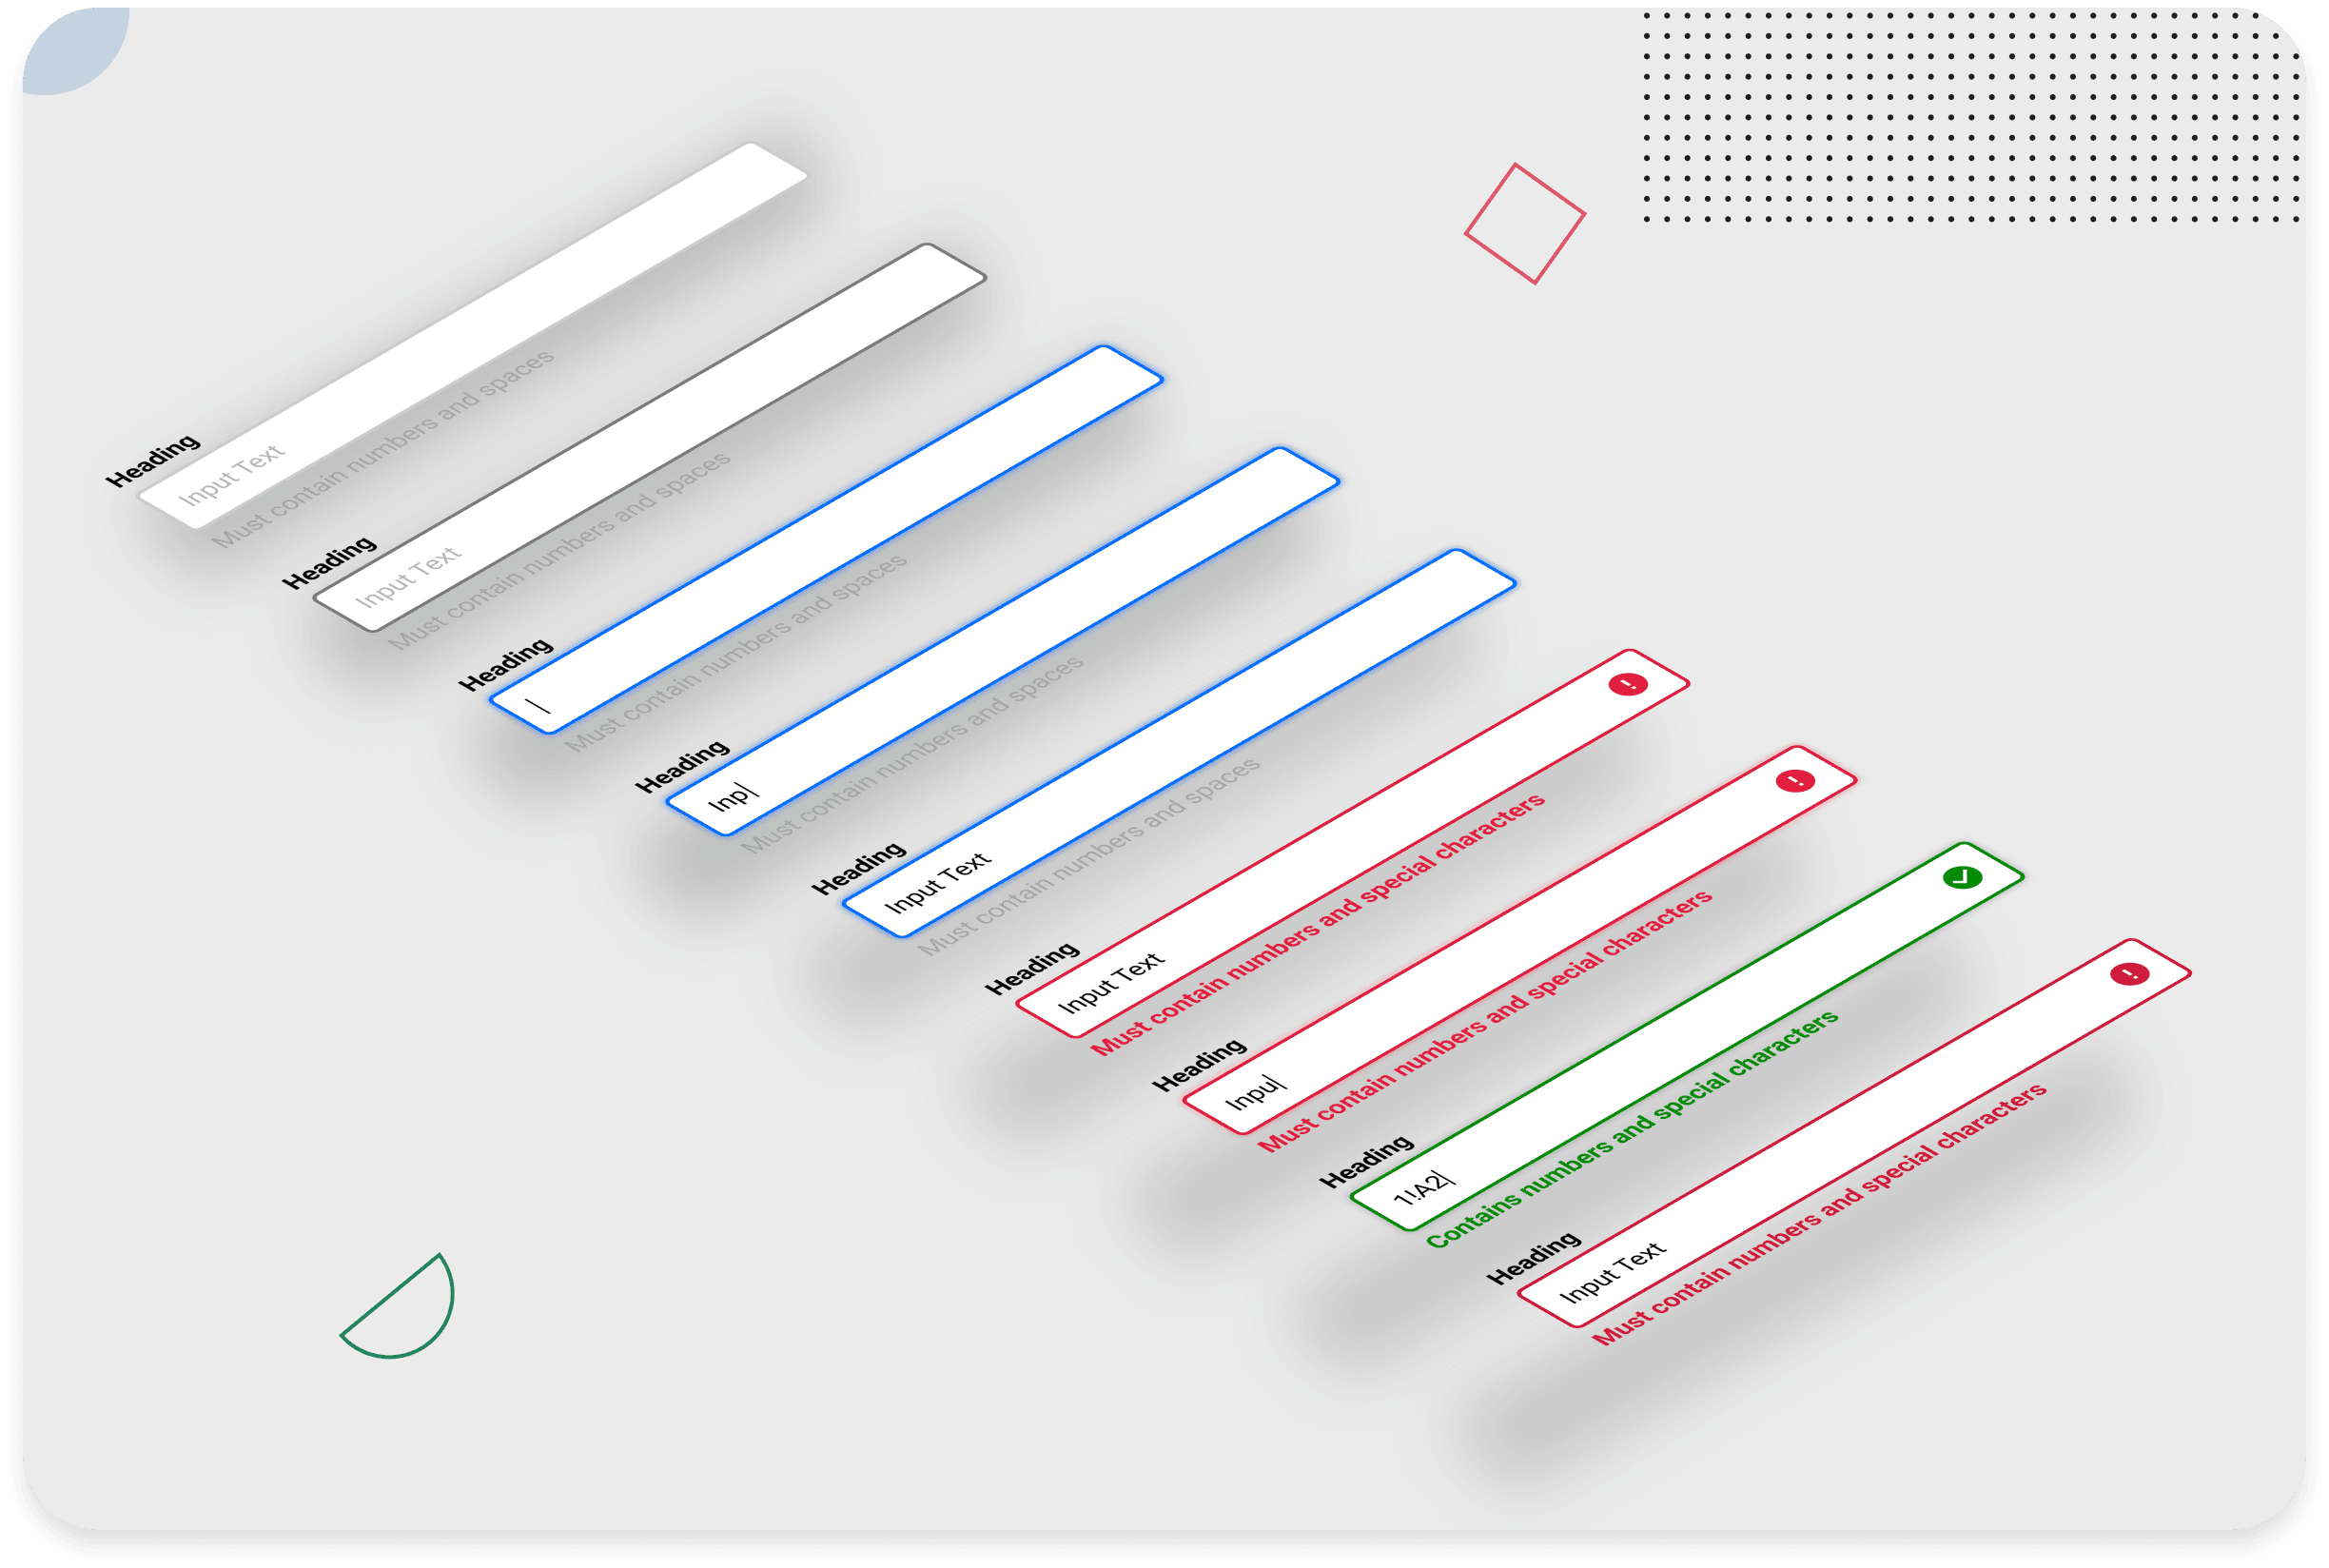
These components are so interactive that a clear separation between states is necessary. For each state, we ensured the design differed enough for the user to understand every instance. It flows as follows:
When a text field is resting, the border is a lighter grey. When hovering over the text field, it becomes a darker grey. When clicking the box, the border becomes blue, with a slight blue shadow to focus the user's attention.
If validation detects an error, the border becomes red (and features a subtle red shadow when clicked in). When the user finishes the field and clicks out, the box returns to its original light grey state.
Using Figma for Design and Collaboration
Like many design teams across the globe, Figma has captured our hearts.
Using Figma has many benefits not only for us as a design team but also for clients. It allows the designers to collaborate whilst working at home.
The capacity for a team of designers to work on one project simultaneously is efficient while supporting a collaborative learning process that increases productivity AND creativity.
Showing a client how components will work in a real-world environment is vital. Figma's prototyping feature shows how a user can interact with a text field whilst it's being pressed, hovering and resting.
In addition, you can collaborate live with clients, allowing them to demonstrate their new system style to their users.
Excelpoint could give their feedback by adding comments directly onto prototypes, which allowed for improved collaboration with the client and reduced the amount of feedback-related time constraints.
'Inspect' is another fantastic feature in Figma. When a designer creates a button, it is often designed to be pixel-perfect to fit a specific grid layout. Colours, padding, text size and font are all specifically chosen.
But, when designs are passed over to developers, the final output can look slightly different from the original design as developers have no details to replicate.
However, you can automatically produce the CSS code by inspecting it in Figma. This is another time-sensitive task that has had the amount of time required on it reduced significantly.
The Importance of a Shared Design Language
User interfaces are constantly evolving to fit the needs of the platforms' users. BOTH designers and developers must know precisely how a component is styled correctly.
A design system is a visual design language that allows product teams to communicate their work. Such an approach means design outputs, such as styling requirements for accessibility and branding, create consistency throughout.
On top of that, design systems automatically boost efficiency. Since all existing components are pre-built, it reduces repetition. These can be taken straight from the design system to start working on any project.
Testing and Feedback for the Design System
Getting back to Excelpoint, once all our designs were complete, we began the testing phase. After all, without testing, how would we know if our designs improved the overall user experience?
Software to Analyse Visual Attention
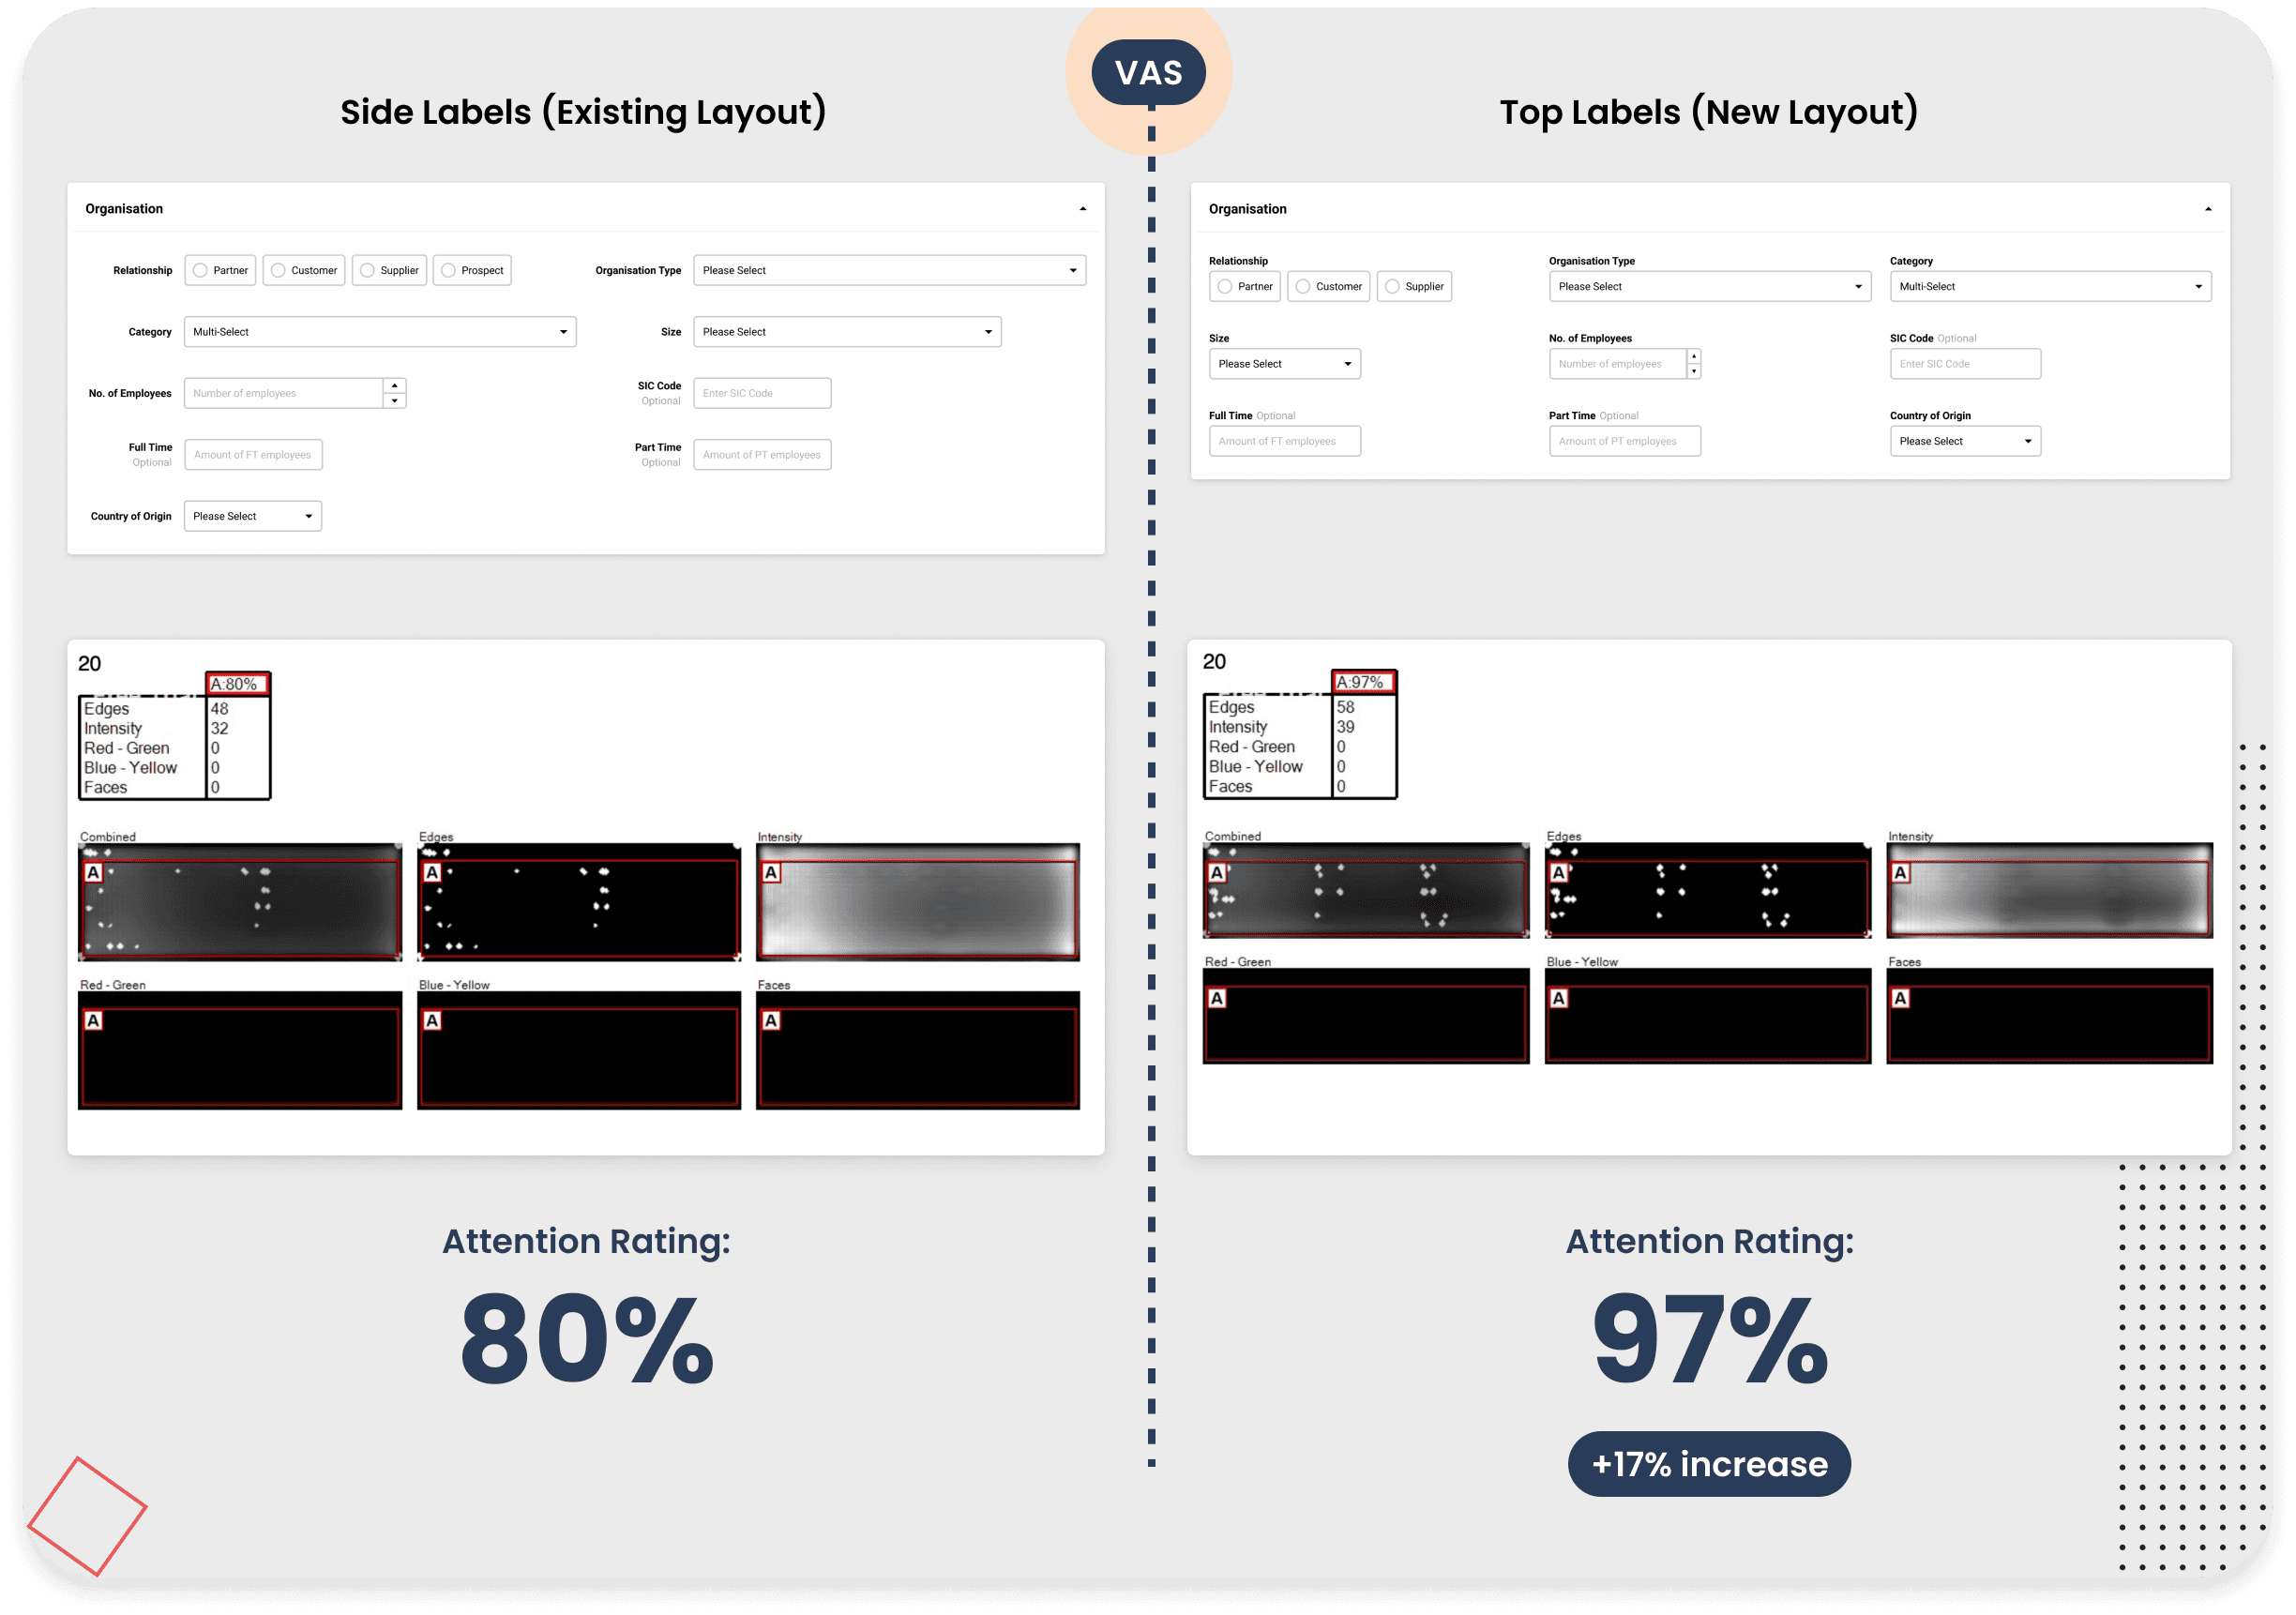
First, we needed to ensure that repositioning the text field title was correct. Based on our research, we repositioned the title from the left side of the field to directly above the text input.
To test this, we used Visual Attention Software (VAS) to generate a report that analyses our design prototypes.
The VAS determines the probability of the input fields being analysed by a user. We ran these tests on both our top-aligned label design and the existing left-aligned title design to generate a comparison between the two.
The total percentage of attention paid to top-aligned label fields was 97%, whereas the existing left-aligned labels had a percentage of 80% attention given.
A 17% increase in attention (according to the VAS algorithm) can make a dramatic difference in conversion rates and overall satisfaction with the user experience.
Colour and Accessibility
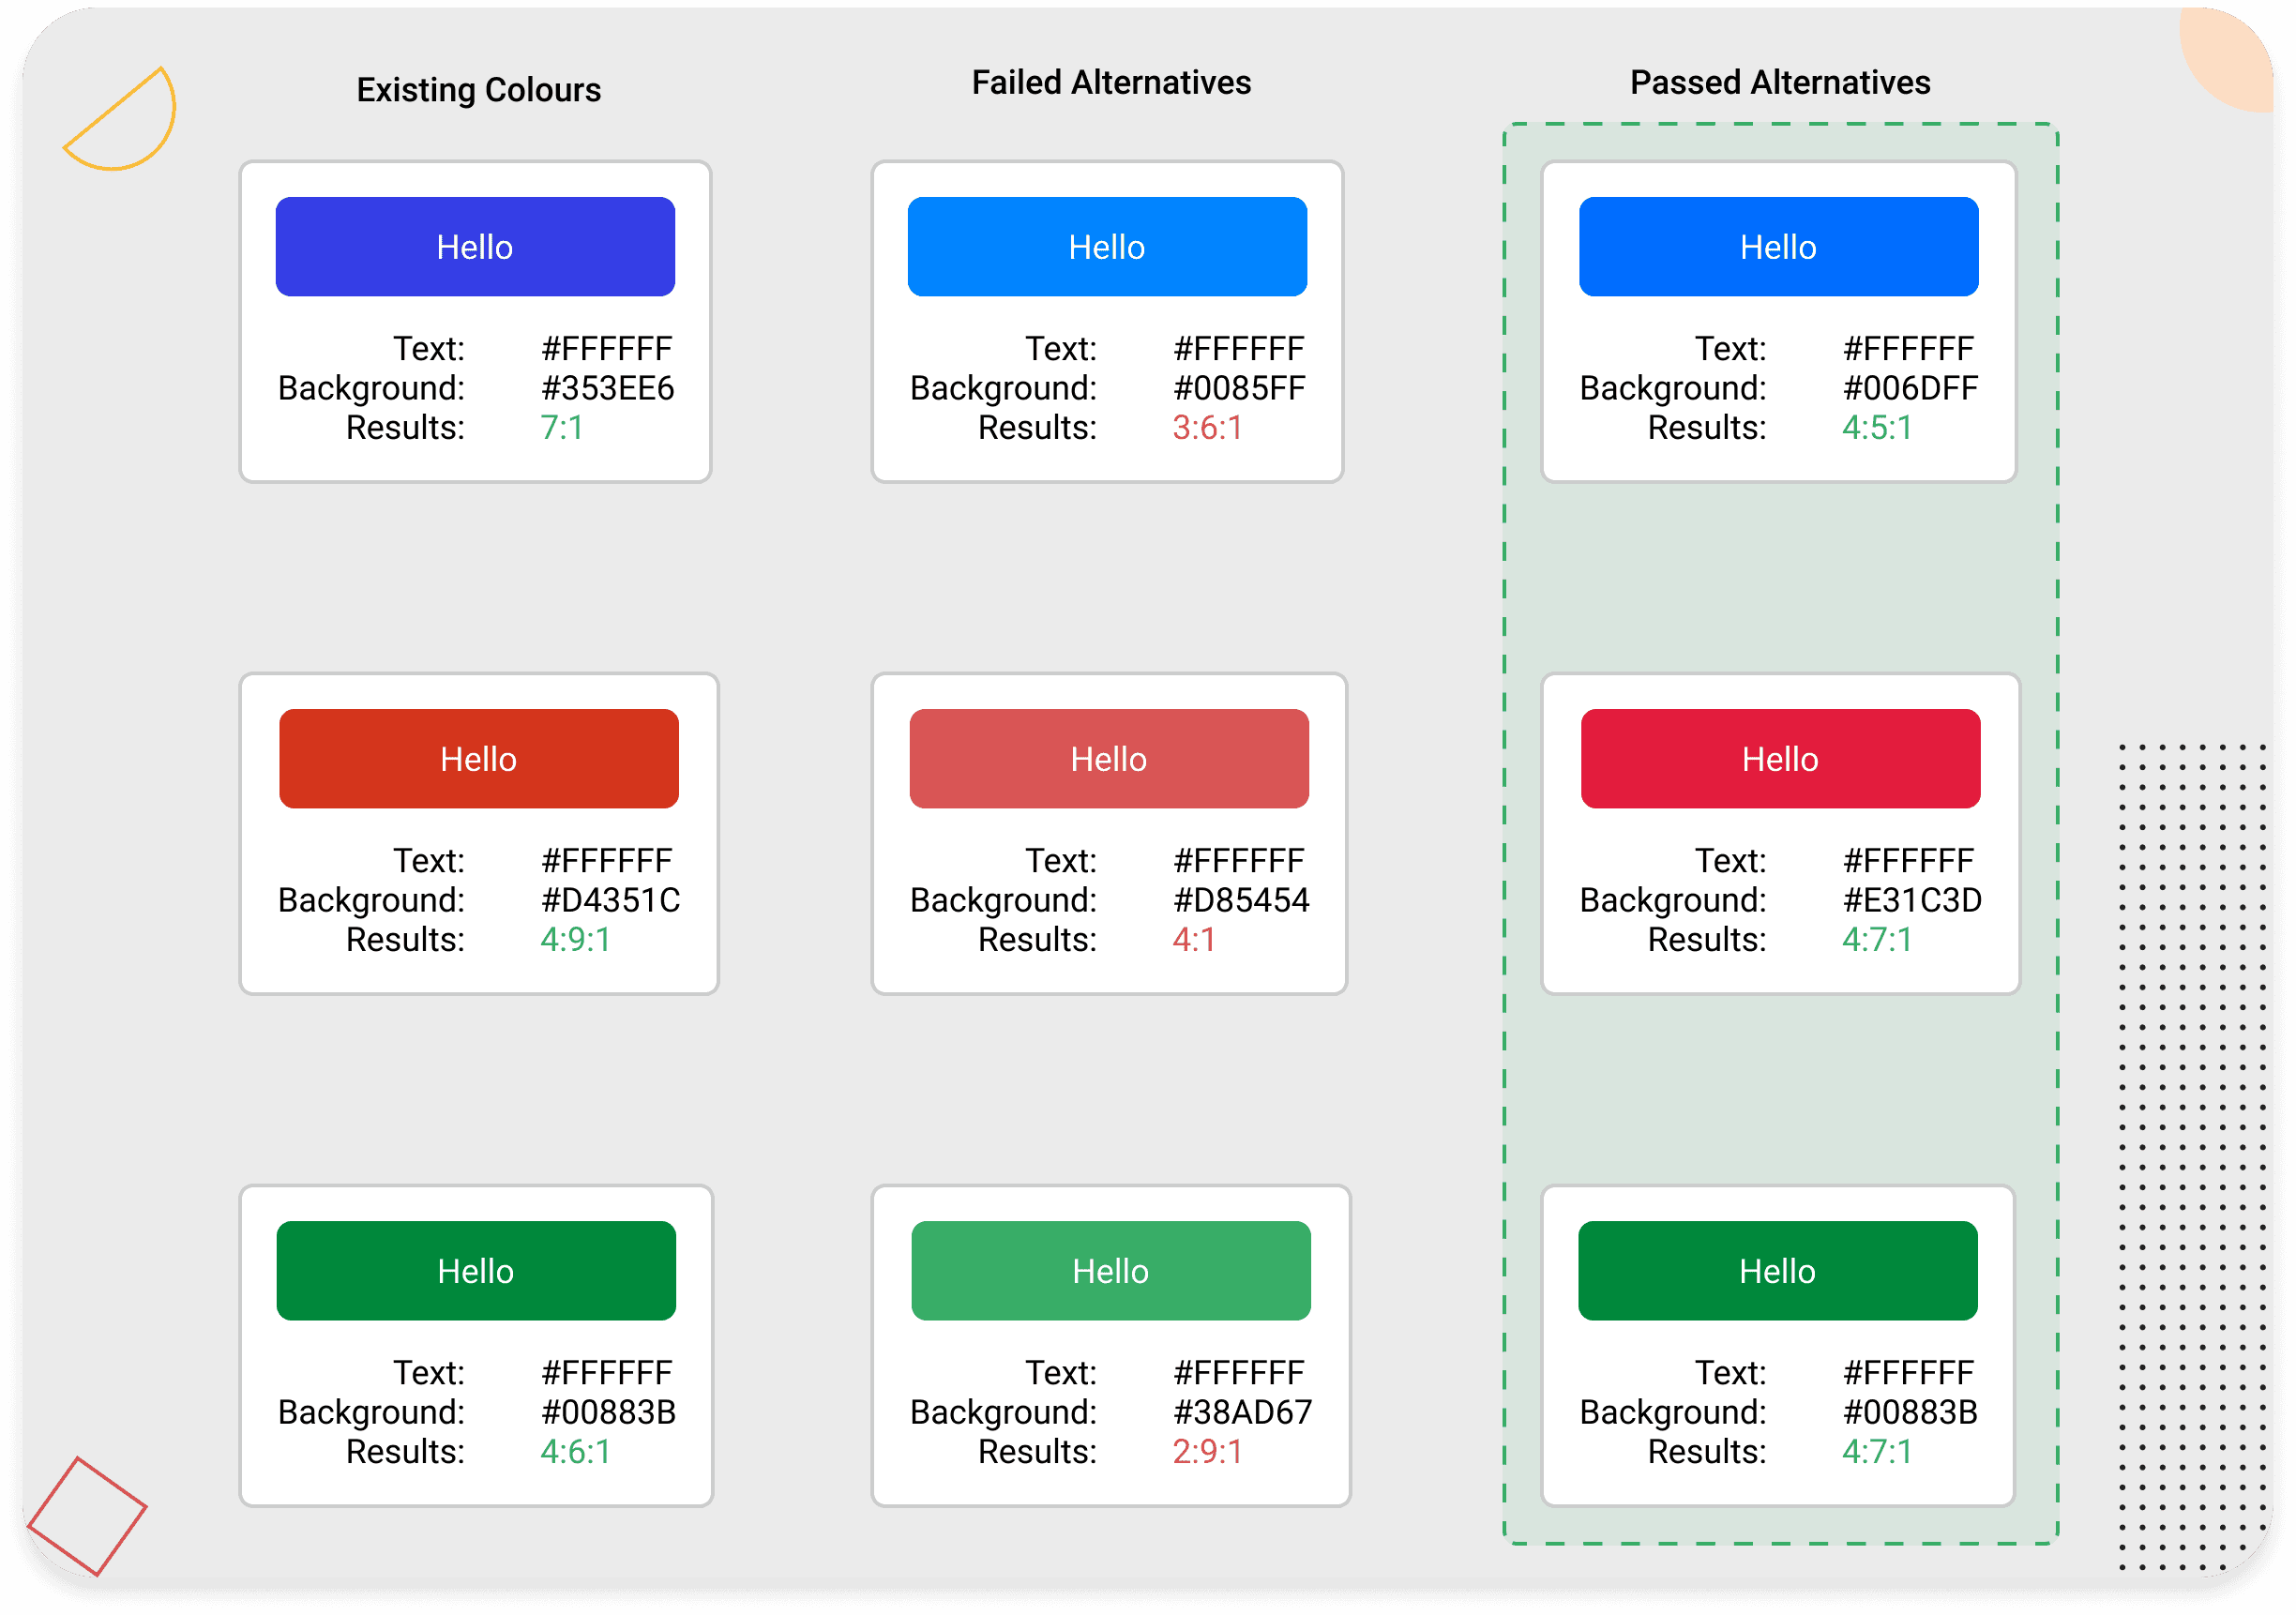
Colour contrast accessibility is a significant factor when designing a new set of components. We tested every possible colour combination and ensured the text and UI elements stood out clearly against their background colour.
N.B. To do this, we tested all colour selections to meet a minimum of an AA rating for colour contrast, a ratio of 4.5:1 or higher.
Not only did we want our selection of colours to be accessible, but we also wanted colours to be uniform. This meant the blue, red, and green colours would be similar in contrast and brightness. By making the colours uniform, we create a visual harmony that helps reduce distractions from dramatic changes in the colour across the user interface.
Communication is Key
To ensure we were not only meeting the needs of accessibility but also Excelpoint's user base, we had regular meetings with our client. In these meetings, we can show new components, prototypes, and changes we made throughout the project.
Two-way communication enables feedback we can use to tailor our approach to accommodate their system and customers. Excelpoint leveraged the interactive prototypes to receive feedback sessions from their core user base.
Conclusion
A well-designed and purposeful design system isn't just to make things look pretty; it's a necessity for digital products. A design system creates consistency, helping to improve the user experience, brand cohesion, and scalability.
As your digital product grows, new features, components, and styles can be added seamlessly to the design system. The benefits include better cost-effectiveness and getting to market in less time.
Need guidance on a design system?
As we mentioned earlier, a lot of teams still don’t have a fully functioning design system in place. Investing time in this may not seem very impactful, but it is an excellent use of your budget.
It will remove strain on already limited in-house resources and improve your overall efficiency when delivering in line with your design system.
Plus, a fully functioning design system will allow SMEs to quickly adapt to market changes and release new features before their competitors do - all while maintaining an aesthetically consistent UI which is accessible and user-focused.
Need someone to create your design system for you? We can help there!
Get in touch with our team now to discover how a design system might look for you.
Let’s talk about design systems - Get in touch

Got an idea? Let us know.
Discover how Komodo Digital can turn your concept into reality. Contact us today to explore the possibilities and unleash the potential of your idea.

Sign up to our newsletter
Be the first to hear about our events, industry insights and what’s going on at Komodo. We promise we’ll respect your inbox and only send you stuff we’d actually read ourselves.


